

Ingredients
Instructions
-
1.
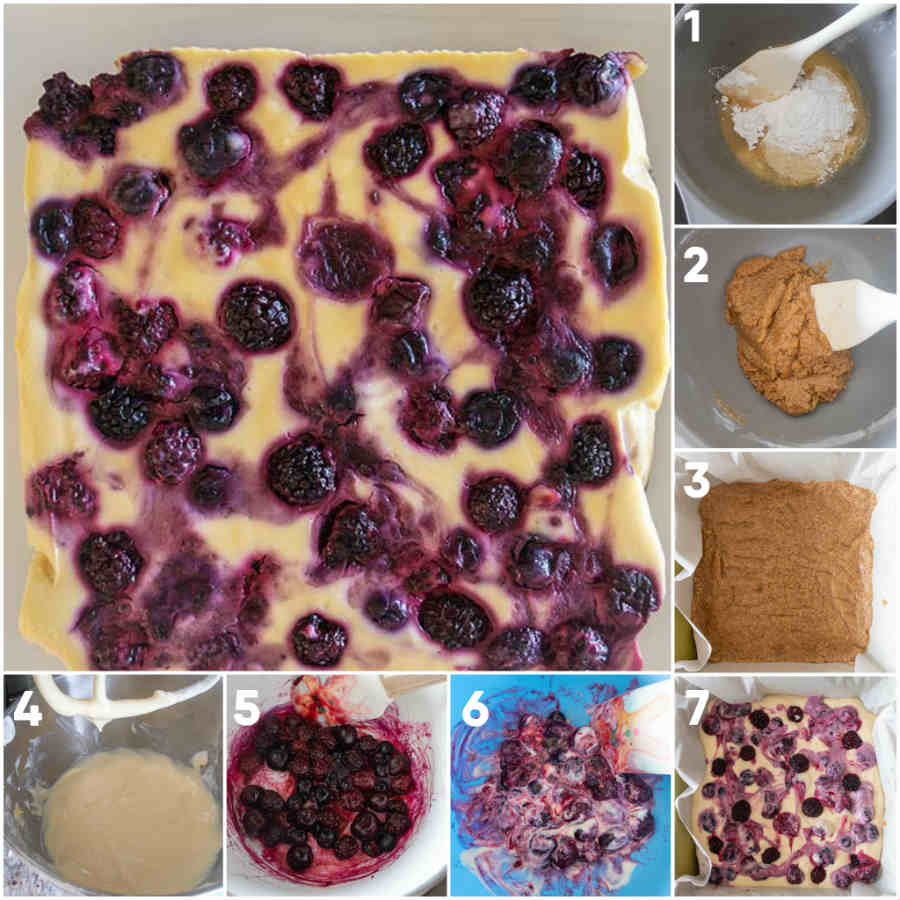
Preheat oven to 325 F and line an 8-inch square baking pan with parchment paper
-
2.
SHORTBREAD CRUST
-
3.
Mix all the ingredients and press into the baking pan. Place the pan in the freezer for 10 minutes, then bake for 12 minutes
-
4.
BERRIES
-
5.
While the crust is baking, add 1 1/2 cups of berries into a small saucepan. Whisk the water with 1 teaspoon of tapioca flour and mix it with the berries. While stirring, cook over medium-high heat until the berries start to release their juices. This should not take longer than two minutes. Set aside to cool
-
6.
CHEESECAKE LAYER
-
7.
In a large bowl, blend cream cheese with yogurt. You can use a stand mixer fitted with the paddle attachment on the lowest speed setting. Or mix it by hand. You don't want to whip it up and incorporate too much air into the mixture
-
8.
Add the sugar and tapioca flour and blend until combined
-
9.
Add the eggs, one at a time, then lemon juice, lemon zest and vanilla and blend until smooth
-
10.
ASSEMBLING THE BARS
-
11.
Reduce the oven temperature to 300 F
-
12.
Gently mix 2 tablespoons of the cheesecake mixture with the berries
-
13.
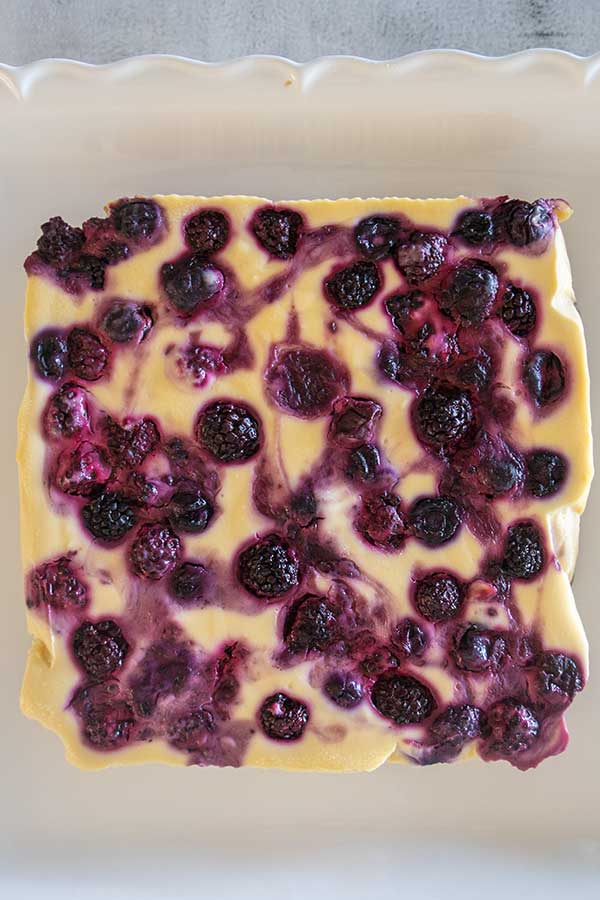
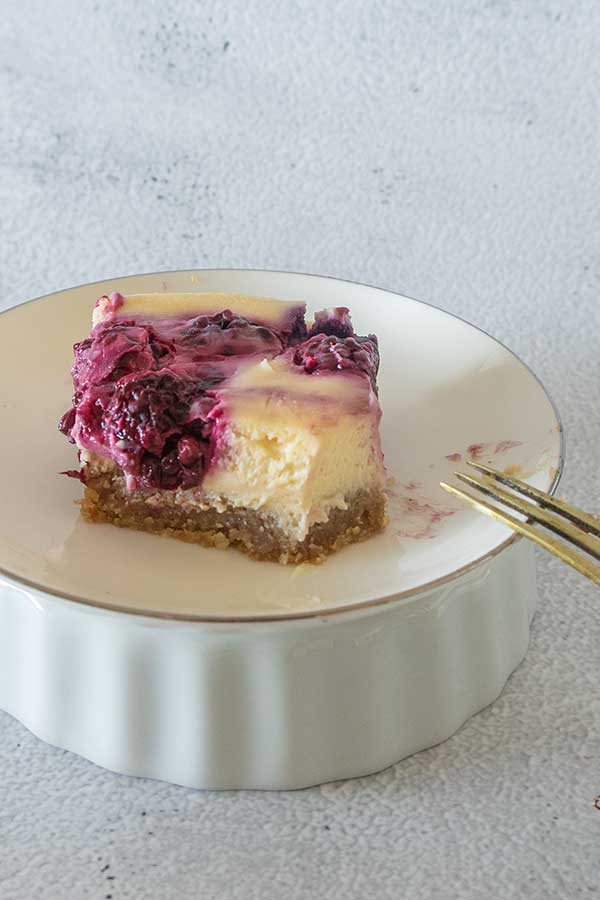
Spread the remaining cheesecake mixture over the cooled crust, and using a spoon, spread the berry mixture over the top. Using a toothpick, gently swirl the berry mixture into the cheesecake layer
-
14.
Evenly distribute the fresh berries over the top of the cheesecake layer and bake for 35 minutes. The cheesecake bars should be light golden around the edges, and the middle is still slightly wobbly when you shake the pan
-
15.
Turn off the oven and allow the cheesecake bars to cool to room temperature in the turned-off oven with the oven door ajar
-
16.
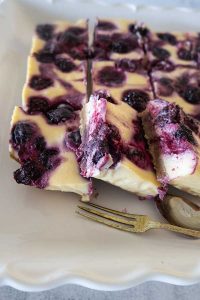
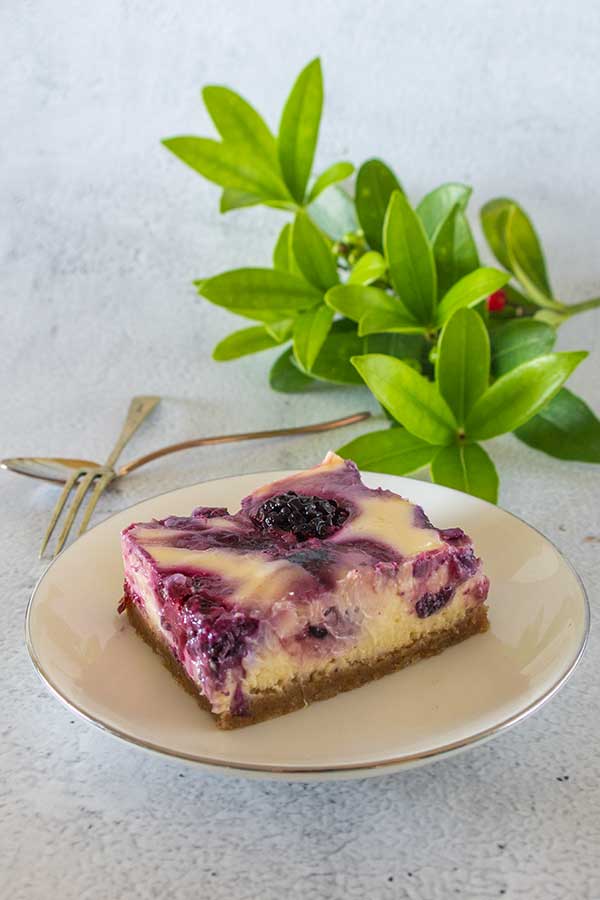
Once cooled, refrigerate for 2 hours or preferably overnight before slicing and removing from the pan
 Kristina
Leave a Reply